Kill Multiple Processes at Once Via Command Line with Taskkill
Ever have a program or process that doesn’t end properly and runs in the background continuously?
I recently encountered this issue with VLC on one Windows 7 machine where it keeps the process never terminates. Since I never reboot the machine for other than Windows Updates, this amounted to 633 copies of VLC running in memory. Each process only used about 633k so it wasn’t an astronomical memory hog but multiply that by 633, you begin to feel the machine slowing down. Task Manager doesn’t let you kill multiple processes in bulk and I didn’t want to go through killing them one by one or rebooting.
The solution? Good old command line. Open up command prompt (start -> run -> cmd.exe). This snippet will kill all processes that start with the taskname:
TASKKILL /IM [TASKNAME]* /F
To kill all VLC processes, you’d use:
TASKKILL /IM vlc* /F
All running VLC processes will be terminated automatically.
jQuery fancybox ‘*.support not defined’ or ‘b.support not defined’ Error
I was importing some code from static HTML pages into a client’s home grown CMS system this morning. When I reviewed the site in Firefox with Firebug running, I was seeing the error:
b.support not defined
The site uses Fancybox to display the window overlays within the site so I had to step through the code and to find out what broke during the migration. Turns out it was a stupid mistake on my part.
Make sure that you include a reference to the jquery library before you load fancybox.
<script type="text/javascript" src="/js/jquery.min.js"></script> <script type="text/javascript" src="/js/Fancybox.js"></script>
Drobo Dashboard Can’t Connect to Drobo when ESET Firewall is Active
Have a Drobo storage unit? If you have ESET Smart Security Firewall enabled, you’ll probably find Drobo Dashboard can’t connect while the firewall is on even after adding all the required ports and services to ESET’s rules from the Drobo online help site (http://goo.gl/iVKVU).
After enabling the detailed logging in ESET, I found that ESET’s firewall was flagging Drobo Dashboard as an intrusion attempt and blocked it. From the Drobo help page (http://goo.gl/iVKVU):
Drobo Dashboard connects to port 5000 and then randomly picks a port in the range for broadcasting.
This is definitely not the most intelligent way to build a product when users who are trying to secure their home or business network and it’s no wonder that ESET flagged the behavior as suspicious. Luckily there’s a fix to keep ESET from blocking the Drobo connection:
- Make sure you add the rules as per Drobo’s site (http://goo.gl/iVKVU).
- Open the main program window by clicking ‘Start’ -> ‘All Programs’ -> ‘ESET’ -> ‘ESET Smart Security’.
- Click on ‘Setup’ on the left, and then click ‘Enter Advanced setup’ on the right to open the Advanced Setup tree.
- From the Advanced Setup tree on the left, Expand ‘Network’, and Click on ‘Personal Firewall’, and then select ‘Interactive mode’ from the Filtering mode drop-down menu on the right.
- From the advanced setup tree, click ‘Personal Firewall’ -> ‘Rules and zones’. Click the ‘Setup…’ button in the Trusted zone section and then choose ‘Allow sharing’. Click ‘OK’.
- Click ‘Personal Firewall’ -> ‘IDS and advanced options’. In the ‘Allowed services’ section, make sure all services are selected. Click ‘OK’.
Drobo Dashboard should now be able to connect to the unit with no issues.
SSL, jQuery, and CDN
I just got whacked by a minor bug with SSL and the Google CDN (totally my fault, not theirs). I stuck the reference to the CDN in my master page not realizing one of the pages would be served up as secured by the vendor due to compliance issues. It made it through all testing because none of the staging/dev environments were configured for SSL and I was not made aware of the fact that we’d be serving the page up through SSL. Internet Explorer 8 prompted users about the insecure content before rendering the page. In their infinite wisdom, Microsoft decided to implement a new workflow for insecure content where the content is ignored and the page renders immediately with the unsecured content ignored. Since jQuery was used on multiple parts of the form, the site essentially broke. Google Chrome and Firefox seem to recognize the CDN as a trusted source and render the page as expected.
To fix the site, I added a javascript check to set the appropriate prefix to the CDN call:
<script>// <![CDATA[ var gaJsHost = (("https:" == document.location.protocol) ? "https://" : "http://"); document.write(unescape("%3Cscript src='" + gaJsHost + "ajax.googleapis.com/ajax/libs/jquery/1.4.3/jquery.min.js' type='text/javascript'%3E%3C/script%3E")); // ]]></script>
SQL 2008 DTSX
The Problem
Earlier today, I was working on setting up DTSX so some end users could run some packages. After loading and testing the packages successfully, the users tried running the package and encountered an interesting error:
SSIS Execution Properties
Failed to open package file “C:\Program Files\Microsoft SQL Server\100\DTS\Packages\dts_filename.dtsx” due to error 0x80070005 “Access is denied.”. This happens when loading a package and the file cannot be opened or loaded correctly into the XML document. This can be the result of either providing an incorrect file name was specified when calling LoadPackage or the XML file was specified and has an incorrect format. ({FFEE8F2F-A0A6-40BE-8CDA-86BEC124F874})
The packages were provided by another vendor so I wasn’t keen on trying to modify things within the packages themselves. I was able to run the packages under my admin account but the end users kept running into the error which lead me to believe that the user needed some special permissions. The users were connecting to this virtual server via remote desktop. While it was a dedicated virtual machine specifically for this project, I really didn’t want to give users admin rights because…well I don’t think that needs to be explained so I hunted around and of course there are no settings for controlling access via permissions in management studio. It was time to take to the interwebs and use my Google-Fu and see what others have found on this error. I found others who had similar errors but none had the exact issue. Some similar errors:
- http://msdn.microsoft.com/en-us/library/aa337083.aspx – This was the closest except that it dealt with remote access which wasn’t the case here. I tried it anyways in case it was the problem.
- http://www.mssqltips.com/tip.asp?tip=1199 – Proxy permissions for SQL agent which is useful to know when creating scheduled jobs.
The Solution
I remembered that SQL Management Studio had issues with accessing files in different locations (i.e. My Documents). With the new security settings in Windows, you may have noticed you need admin rights to add, run, or or modify folders/files in locations like c:\Program Files in Windows 7/2008. I wondered if DTSX used a special permission that allowed it to access files and checked the groups under the Server Manager. I found a group called SQLServerDTSUser$[MachineName]. I added the users who were executing the packages to this group and then checked the permissions on the folder C:\Program Files\Microsoft SQL Server\100\DTS which didn’t have the group listed. I added the group to the folder permissions, tested the package and voila – it worked.
‘Windows XP Mode’ could not be started because there are not enough system resources or memory in your computer. You can shut down other virtual machines or close open applications and try again.
If you’re running Windows 7 and try to install Windows XP mode, you might run into the error “‘Windows XP Mode’ could not be started because there are not enough system resources or memory in your computer. You can shut down other virtual machines or close open applications and try again.”
You’ll need to find the app causing the problem. You can use msinfo to figure out which apps are resource intensive.
- Click Start, click Run, type msinfo32 in the Open box, and then click OK.
- Expand Software Environment, and then click Running Tasks.
- View the values in the Min Working Set and the Max Working Set columns for each process to determine the process that uses a lot of physical memory.
Actual Cause
In my case, I discovered Stardock Tiles and Virtual PC are not compatible. Kill the Tiles process and you’ll be able to run Virtual PC. You can run Stardock Tiles after loading up Virtual PC though.
Update 3-23-12
A few people (Thanks Tom!) have commented on the issue and have pointed out for them that Google’s CrashHandler process also interferes with Virtual PC. You can either kill it through task manager or disable it completely by doing the following:
2. Go to File Menu >Options
3. Click the tab Under The Hood, and uncheck the option which says – Help Google Chrome better by automatically sending the usage statistics and crash reports to google
Did you know…?
Windows 7 sports tons of new features and surprises that have gotten little to no fanfare.
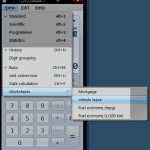
Did you know that Microsoft has updated the Windows Calculator with Windows 7 with some really new and useful features? Previously, most of these features often required you to open Excel or use some website to solve the problems they address. The calculator sports new features including Unit Conversion, Date Calculation, Mortgage, Vehicle Lease, Fuel Economy (in both MPG and KM no less!) You can find the different options under the View menu after opening the calculator up. See screenshots below for examples of what the calculator can do.
{Unable to evaluate expression because the code is optimized or a native frame is on top of the call stack.}
Problem
If you’re working in ASP.NET and ever ran into the error:
{Unable to evaluate expression because the code is optimized or a native frame is on top of the call stack.}
You’ll probably find that the stack trace gives you no useful information as to where the error actually occurred.
The Solution
For Response.Redirect, use the overload function (Response.Redirect(String url, bool endResponse)) and pass false into the EndResponse parameter:
[csharp]Response.Redirect ("nextpage.aspx", false);[/csharp]
For Response.End, you’ll need to call the HttpContext.Current.ApplicationInstance.CompleteRequest method instead of Response.End to bypass the code execution to the Application_EndRequest event.
Details
The error occurs when you use Response.End, Response.Redirect, or Response.Transfer.The Response.End method ends the page execution and shifts the execution to the Application_EndRequest event in the application’s event pipeline. The line of code that follows Response.End is not executed. This problem occurs in the Response.Redirect and Server.Transfer methods because both methods call Response.End internally.
Detecting ASP.NET debug mode
The Problem
Recently I ran into a situation where I needed to debug ASP.NET code in a production environment that we had no control over. The server was managed by a third party support team and we deployed to a staging environment through a custom web deployment utility they built.
Of course, the code ran locally and on our internal staging environments with no issues but when deployed to the client’s remote staging servers, the application was encountering odd errors that we couldn’t replicate.
At this point, I wanted to add code to the web application that could be turned on and off without having to recompile deploy new dlls because of code changes in the code behind. With this particular client, code changes would trigger security scans that took over a week to complete and we were short on time.
The Solutions that Should’ve Worked but Didn’t.
Page Tracing wasn’t working. I remembered the #if Debug and HttpContext.Current.IsDebuggingEnabled statements worked rather well in other projects.
So I added:
#if Debug //Debug code here #endif
to the web application. Nothing happened so I tried:
if(!HttpContext.Current.IsDebuggingEnabled)
but it kept returning false even though debug mode was set to true in the web.config file.
The Solution (that worked!)
Finally I got the bright idea to read out the debug setting out of the web.config and execute code if the debug flag was set to true. How to do so wasn’t exactly obvious though.
After some searching, I finally figured it out and here’s the code snippet that will execute only if the debug flag is set to true:
System.Web.Configuration.CompilationSection cfg = (System.Web.Configuration.CompilationSection)ConfigurationManager.GetSection("system.web/compilation"); if (cfg.Debug) { Response.Write(ex.ToString()); }
Why Didn’t the Normal Debug Statements Work?
The issue was that the machine was configured as production. The machine.config overrode the web.config since the <deployment retail=”true”/> switch was set in Machine.config.
This setting disables Page.Tracing & #If Debug and always sets the IsDebuggingEnabled to false. This was done by Microsoft as a security precaution for companies so they could ensure no applications were deployed with debugging enabled by mistake.
Bonus! How Do I Loop Through All Session Variables in C#?
I wanted to see what the session variable values were during execution of the page with the caveat that it would only run if the debug flag was set to true.
<% System.Web.Configuration.CompilationSection cfg = (System.Web.Configuration.CompilationSection)ConfigurationManager.GetSection("system.web/compilation"); if (cfg.Debug) { for(int i = 0; i < Session.Contents.Count; i++) { Response.Write(Session.Keys[i] + " - " + Session[i] + "<br />"); } } %>
I added the code directly to the bottom of the aspx page since I didn’t want to modify the code behind and voila! Once the code was added to the page, we found that the expected session variables weren’t populating correctly on the remote server. Unfortunately it required a code change to resolve the issue but I never would have found the cause without the above snippet of code.
Stupid Admin Tales Part 1
Life as an system/network admin can be extremely fun and satisfying when you’re not bogged down with management and people breathing down your neck. Of course it has moments to cause you to sweat a giant puddle in the middle of the server room. We’ve all made mistakes and (hopefully) learn never to repeat them. Sometimes we’re doomed to repeat them no matter what precautions we take.
In one of my first jobs as a system admin, I used to be responsible for a small business server in a 5-10 user office. One of the downsides of working in a small business is often the budgets don’t coincide with the real needs and you’re often forced to make things work using bubble gum and sticks. Duct tape was a luxury for spoiled admins that was completely out of the budget I was given. The first machine purchased was a bare-bones Windows 2000 machine which served as a file and print server for the office. Not too bad, right? Unfortunately due to budget constraints, this machine ran Windows 2000 Professional, not the server edition that was recommended. It had to function on a workgroup as a server since Active Directory was not an option. Security was managed at a workgroup level meaning all changes had to be made on every PC individually as well as the server. Luckily with 5-10 users, it wasn’t unmanageable and changes could be made to most machines after hours.
As the business grew due to better use of the technology and skills of the IT team (read: Me), the budgets increased slightly and I was allowed to upgrade hardware to a better machine but the Server license was still out of the budget I was provided. The network still purred and all users were happy with the performance and uptime and how smooth things ran. As more data was used and saved, backup became a major priority. With the limited budget a tape backup drive was too expensive, and as this was pre-cloud era, a Maxtor One Touch backup and DVD backups were the only solutions available as options to consider. Dual backup systems were a must for redundancy and off-site backup capability. Everything was implemented and tested successfully with restores working with no issues from both the drive and DVDs.
Flash forward roughly two years and the server’s primary hard drive fails and the secondary seemed to have become corrupted. Luckily the server was under warranty and the hard drive was replaced at no cost. There were backups of everything so data loss wasn’t a concern. After replacing both drives, I loaded the Windows disk and began the install process. Setup detected the new drive and my standard operating procedure is to format the drive to get it NTFS ready. The C: drive was selected and setup began the format and I walked away to complete other tasks. I came back a short while later and found Windows was installing and smiled. It was about then I noticed the lights on the Maxtor drive blinking as if data were being read/written.
A frown replaced the smile as my brain tried to process why the light would be blinking if Windows is installing on the drive and hadn’t gotten to the driver installation portion yet. I processed different scenarios as quickly as possible trying to find valid reasons why the lights would be blinking. It was a horrifying realization that there’s no way to cancel the install without shutting down the machine forcibly which could damage a drive. I weighed my options carefully and decided that in the event that my fear was for naught, I’d simply be able to start the install process over again.
Off the machine went and the Maxtor drive stuttered. Sweat began to build on my forehead as I knew there was no denying it. Windows setup was inexplicably installing to the external drive even though I selected the C: drive. I began damage assessment to see how bad things were. I unplugged the drive and reinstalled Windows and loaded the drive back on. All the data was gone and a partial Windows install was all that remained.
“Wait! Maybe data can be recovered using one of the many tools in my arsenal!” I so foolishly thought to myself. Windows had somehow managed to install itself over only the sectors where all the data was and only a few files were recoverable. I then realized I had DVD backups and quickly rushed to retrieve them from my office. I plopped the most recent disk in and then tried to copy the data back. A message box that simply said “Cyclic Redundancy Check” suddenly greeted me. I grabbed the next disk and tried to restore from that to find the files wouldn’t copy or open. I grabbed the first disk that I tested and knew worked only to find even the files there wouldn’t copy or open. I was dumbfounded as I had tested the discs to ensure that the backups were valid.
So at this point, you might be asking yourself what could possibly have happened? It turns out for some completely inexplicable and idiotic reason, Windows setup chooses the external drive as the primary and sets it to C. The DVD backup issues I only figured out recently. The issue was caused by the NTFS ID being different for the new Windows install. The NTFS IDs were now different on the new server. As the data was on non-writeable media, there was no way to set permissions of the files which made them completely useless.
Lesson learned? Unplug all drives when doing any OS work and DVD backups aren’t worth the disks they’re saved on.
Years later, a friend called me up with issues with his PC and asked if I could help. I went over, diagnosed that the hard drive was failing and that it needed to be replaced was done with no issues. After reconnecting all the cables back to the PC, I checked and saw no backup drives anywhere. I double checked and asked if said friend had backups of the data to be restored and was assured he did and that the drive was safe. I began the install and Windows began to format the new drive. It was then I heard the familiar grind of an external drive when data was being written to it. Reflexively, I shutdown the PC and cut off the installation. I called to my friend and asked why I heard an external drive when none were around that I could see even after tracing all cables. One of his many skills was carpentry and it turned out that he felt the drive was an eyesore and mounted it away behind the desk completely out of sight. I didn’t find any cables to it when I traced them all because the drive was plugged into a printer with a USB hub built into it. Even worse of a coincidence, the new drive wasn’t recognized by Windows due to incorrect jumper settings. The single drive I saw in the list which assured me there was only one drive available turned out to be the external drive.
I spent about two weeks recovering the data on that drive. Luckily I only lost some unimportant videos.
Lesson learned? Unplug all USB cables until after Windows setup is complete.