ASP.NET MVC Model Generator
In making the switch to ASP.NET MVC, I’ve moved away from using my old Data Access Layer that I’ve used for years and have opted to use Dapper as my ORM of choice in the quest for optimal performance. My DAL was actually pretty optimized for WinForms and WebForms (using straight SQL Queries and SQL parameters) but mapping it to models wasn’t something I had in mind when I created it. I’m finding Dapper takes some getting used too but it is still pretty fast. The downside is that writing the code for Models to wire it up is proving to be a little tedious.
To that effect, I wrote a little application that has helped me generate the models from a database dynamically. It’s in it’s infancy stages and something I cobbled together in less than 8 hours but it works. I’ll add more features too as time goes on if there’s enough interest or to satisfy my own needs. In the meantime, I’m open sourcing the project as it may help others and I’d love to see it become something grander if others are willing to contribute to it. There’s also some useful bits of code that others may find useful to reference like dynamically reading fields from a database, pluralization/singularization of words, amongst others.
You can find the repository on Github: https://github.com/gregvarghese/MVCModelGenerator
ESET AntiTheft Causes Dell Machines to Lose Permissions on C:
I just spent the past two days complaining about Windows 8 to everyone I know because of how awful the experience is. I installed Windows updates, rebooted, and the system stops working.
It turns out it wasn’t Windows causing the problem but ESET AntiTheft on Dell laptops. It turns out there’s a permission bug specific to Dell machines when ESET creates it’s ghost account and instead of giving it restricted access, the system essentially copies the permissions and then changes everything on the C: drive to a state where the permissions are no longer accessible.
Unfortunately, the only known fix at this point is to contact ESET support. I called their support line in North America and the tech knew about the issue right away. You’ll have to reboot into safe mode, and then get them to remote in to install a utility that runs a script that resets the permissions.
Contact Info here: http://www.eset.com/us/about/contact/
The tech assured me they are working with Dell to get this issue resolved so until they do, make sure you don’t activate ESET’s AntiTheft on the Dell machine.
Uninstalling Trend Micro Client/Server Security without a Password
Lost or forgot your Trend Micro Client/Server Password? How about inheriting a computer that had the software installed by an IT team or consultant that won’t give up the password? I had to work on a network with the latter and it’s rather annoying. The product is utter crap as the machine is spyware infested even though the antivirus is running and present. I went to uninstall it but can’t because the previous person/company password protected it and nobody has it.
Here’s how to bypass the protection:
- Load up Regedit and browse to:
HKEY_LOCAL_MACHINE\SOFTWARE\TrendMicro\PC-cillinNTCorp\CurrentVersion\Misc.\Allow Uninstall - Change the value to 1.
Now you can uninstall TrendMicro’s crappy product and replace with a real solution like Eset.
TrustedInstaller.EXE CPU Usage
Solution 1: Clear Problem History
The following fix is intended for situations where trustedinstaller.exe causes problems due to the Problem Reports and Solutions history maintained in Windows Vista.
- Go to Start and then select Control Panel.
- Turn on Classic View.
- Select Problem Reports and Solutions.
- Click Clear Solution and Problem History in the left panel.
- Confirm your decision.
- Exit the Problems Reports and Solutions Window and Control Panel.
You can also click Change in the Problems Reports and Solutions Window. And then change the configuration from Check for solutions automatically setting to Ask me to check if a problem occurs.
Solution 2: Change Microsoft Update Startup Settings to Manual
- Go to Start and then select Control Panel.
- Select Administrative Tools and then select Services.
- Scroll down to Microsoft Update, right-click on it and then select Stop.
- Right-click on Microsoft Update again and select Properties.
- On the General tab, set Startup type as Manual.
- Next, display the Recovery tab.
- Choose Take No Action and click OK for First Failure.
- Exit the properties dialog box.
- Bring up your Task Manager by pressing on Ctrl + Alt + Del or Ctrl + Shift + Esc.
- On the Processes tab, look for and select trustedinstaller.exe.
- Click End process to kill trustedinstaller.exe.
Solution 3: Disable Automatic Update
- Go to Start and then select Control Panel.
- Go to System and Maintenance.
- Click Turn automatic update on or off option.
- Next, depending on your preference choose one of the following options:
- Never check for updates (not recommended)
- Check for updates but let me choose whether to download and install them
- Download updates but let me choose whether to install them
- Click OK to save your changes and exit the dialog box.
Solution 4: Stop the Windows Module Installer That Runs Trustedinstaller.exe
- Click on Start, in the Start Search box, type msconfig and then press Enter.
- Click Continue when User Account Control prompt is displayed.
- In the System Configuration window that is displayed, open the Services tab.
- Locate and clear the Windows Module Installer check box.
- Click OK save your changes and exit the dialog box.
- Next, open Services window again and change the Startup type of Windows Module Installer to Manual.
Drobo Dashboard Can’t Connect to Drobo when ESET Firewall is Active
Have a Drobo storage unit? If you have ESET Smart Security Firewall enabled, you’ll probably find Drobo Dashboard can’t connect while the firewall is on even after adding all the required ports and services to ESET’s rules from the Drobo online help site (http://goo.gl/iVKVU).
After enabling the detailed logging in ESET, I found that ESET’s firewall was flagging Drobo Dashboard as an intrusion attempt and blocked it. From the Drobo help page (http://goo.gl/iVKVU):
Drobo Dashboard connects to port 5000 and then randomly picks a port in the range for broadcasting.
This is definitely not the most intelligent way to build a product when users who are trying to secure their home or business network and it’s no wonder that ESET flagged the behavior as suspicious. Luckily there’s a fix to keep ESET from blocking the Drobo connection:
- Make sure you add the rules as per Drobo’s site (http://goo.gl/iVKVU).
- Open the main program window by clicking ‘Start’ -> ‘All Programs’ -> ‘ESET’ -> ‘ESET Smart Security’.
- Click on ‘Setup’ on the left, and then click ‘Enter Advanced setup’ on the right to open the Advanced Setup tree.
- From the Advanced Setup tree on the left, Expand ‘Network’, and Click on ‘Personal Firewall’, and then select ‘Interactive mode’ from the Filtering mode drop-down menu on the right.
- From the advanced setup tree, click ‘Personal Firewall’ -> ‘Rules and zones’. Click the ‘Setup…’ button in the Trusted zone section and then choose ‘Allow sharing’. Click ‘OK’.
- Click ‘Personal Firewall’ -> ‘IDS and advanced options’. In the ‘Allowed services’ section, make sure all services are selected. Click ‘OK’.
Drobo Dashboard should now be able to connect to the unit with no issues.
Kill Multiple Processes at Once Via Command Line with Taskkill
Ever have a program or process that doesn’t end properly and runs in the background continuously?
I recently encountered this issue with VLC on one Windows 7 machine where it keeps the process never terminates. Since I never reboot the machine for other than Windows Updates, this amounted to 633 copies of VLC running in memory. Each process only used about 633k so it wasn’t an astronomical memory hog but multiply that by 633, you begin to feel the machine slowing down. Task Manager doesn’t let you kill multiple processes in bulk and I didn’t want to go through killing them one by one or rebooting.
The solution? Good old command line. Open up command prompt (start -> run -> cmd.exe). This snippet will kill all processes that start with the taskname:
TASKKILL /IM [TASKNAME]* /F
To kill all VLC processes, you’d use:
TASKKILL /IM vlc* /F
All running VLC processes will be terminated automatically.
Drobo Dashboard Can’t Connect to Drobo when ESET Firewall is Active
Have a Drobo storage unit? If you have ESET Smart Security Firewall enabled, you’ll probably find Drobo Dashboard can’t connect while the firewall is on even after adding all the required ports and services to ESET’s rules from the Drobo online help site (http://goo.gl/iVKVU).
After enabling the detailed logging in ESET, I found that ESET’s firewall was flagging Drobo Dashboard as an intrusion attempt and blocked it. From the Drobo help page (http://goo.gl/iVKVU):
Drobo Dashboard connects to port 5000 and then randomly picks a port in the range for broadcasting.
This is definitely not the most intelligent way to build a product when users who are trying to secure their home or business network and it’s no wonder that ESET flagged the behavior as suspicious. Luckily there’s a fix to keep ESET from blocking the Drobo connection:
- Make sure you add the rules as per Drobo’s site (http://goo.gl/iVKVU).
- Open the main program window by clicking ‘Start’ -> ‘All Programs’ -> ‘ESET’ -> ‘ESET Smart Security’.
- Click on ‘Setup’ on the left, and then click ‘Enter Advanced setup’ on the right to open the Advanced Setup tree.
- From the Advanced Setup tree on the left, Expand ‘Network’, and Click on ‘Personal Firewall’, and then select ‘Interactive mode’ from the Filtering mode drop-down menu on the right.
- From the advanced setup tree, click ‘Personal Firewall’ -> ‘Rules and zones’. Click the ‘Setup…’ button in the Trusted zone section and then choose ‘Allow sharing’. Click ‘OK’.
- Click ‘Personal Firewall’ -> ‘IDS and advanced options’. In the ‘Allowed services’ section, make sure all services are selected. Click ‘OK’.
Drobo Dashboard should now be able to connect to the unit with no issues.
‘Windows XP Mode’ could not be started because there are not enough system resources or memory in your computer. You can shut down other virtual machines or close open applications and try again.
If you’re running Windows 7 and try to install Windows XP mode, you might run into the error “‘Windows XP Mode’ could not be started because there are not enough system resources or memory in your computer. You can shut down other virtual machines or close open applications and try again.”
You’ll need to find the app causing the problem. You can use msinfo to figure out which apps are resource intensive.
- Click Start, click Run, type msinfo32 in the Open box, and then click OK.
- Expand Software Environment, and then click Running Tasks.
- View the values in the Min Working Set and the Max Working Set columns for each process to determine the process that uses a lot of physical memory.
Actual Cause
In my case, I discovered Stardock Tiles and Virtual PC are not compatible. Kill the Tiles process and you’ll be able to run Virtual PC. You can run Stardock Tiles after loading up Virtual PC though.
Update 3-23-12
A few people (Thanks Tom!) have commented on the issue and have pointed out for them that Google’s CrashHandler process also interferes with Virtual PC. You can either kill it through task manager or disable it completely by doing the following:
2. Go to File Menu >Options
3. Click the tab Under The Hood, and uncheck the option which says – Help Google Chrome better by automatically sending the usage statistics and crash reports to google
Did you know…?
Windows 7 sports tons of new features and surprises that have gotten little to no fanfare.
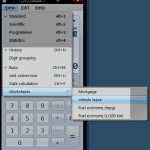
Did you know that Microsoft has updated the Windows Calculator with Windows 7 with some really new and useful features? Previously, most of these features often required you to open Excel or use some website to solve the problems they address. The calculator sports new features including Unit Conversion, Date Calculation, Mortgage, Vehicle Lease, Fuel Economy (in both MPG and KM no less!) You can find the different options under the View menu after opening the calculator up. See screenshots below for examples of what the calculator can do.